

Is your favorite faux leather handbag starting to peel and lose its charm? It’s frustrating to see those cracks and flakes, especially when you’ve grown attached to your bag.
But before you think about tossing it out or buying a new one, there’s good news—you can fix it yourself! With a few simple steps, some basic supplies, and a little patience, you can bring your peeling faux leather handbag back to life.
In this guide, you’ll discover easy, effective ways to repair the peeling, restore the color, and protect your bag so it looks great for longer. Ready to save your handbag and keep it looking fresh? Let’s dive into how you can do just that.
Materials Needed
Gathering the right materials makes fixing a peeling faux leather handbag easier. Using proper supplies ensures a neat and lasting repair. Below are key items to prepare before starting your project.
Leather Adhesive Options
Choose an adhesive made for faux leather or vinyl. Contact cement works well for strong bonds. Fabric glue is flexible and dries clear. Leather repair kits often include special glues designed for synthetic leather. Avoid regular household glues, as they may cause damage or not hold well.
Color Matching Paints And Dyes
Use leather paints or dyes made for synthetic materials. These products blend well and restore color naturally. Acrylic leather paint is popular for its durability and variety of colors. Mix paints carefully to match your handbag’s shade. Test colors on a hidden spot before applying.
Tools For Repair
Prepare small brushes for precise painting and application. Use fine scissors or a craft knife to trim peeling edges. Soft sandpaper smooths rough areas before gluing. Cotton swabs help apply glue in tight spaces. Keep a clean cloth handy for wiping surfaces and spills.

Preparing The Bag
Preparing your peeling faux leather handbag is the first step to a successful repair. Proper preparation ensures the adhesive and paint stick well. It also creates a smooth, clean surface for a neat finish.
This process involves cleaning the bag, trimming loose pieces, and smoothing rough edges. Taking time here saves effort later and improves results.
Cleaning The Surface
Start by wiping the bag gently with a damp cloth. Remove dirt, dust, and oils that block adhesion. Use mild soap if needed, but avoid soaking the material. Let the bag dry fully before moving on.
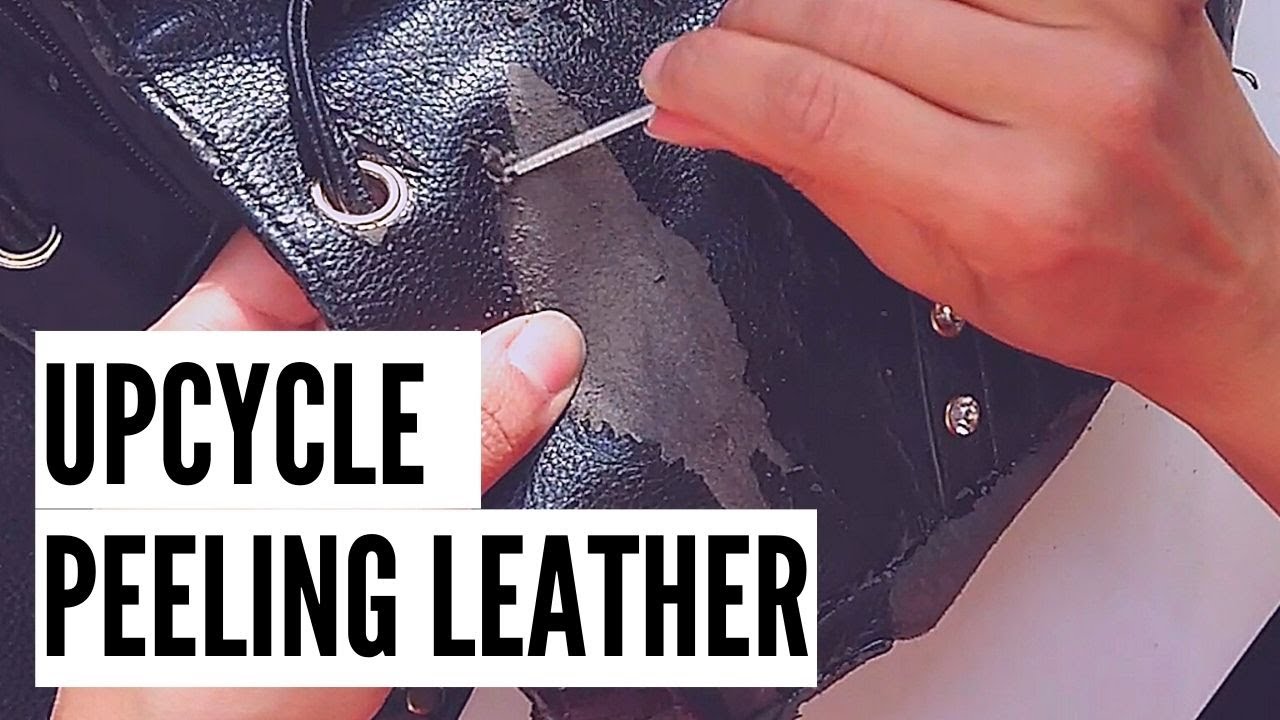
Trimming Loose Pieces
Look closely for peeling flakes or loose bits. Use small scissors or a sharp blade to cut these away carefully. Removing loose pieces stops further peeling and creates a stable area to repair. Be gentle to avoid cutting the good leather.
Sanding Rough Edges
Lightly sand the edges of the peeled area with fine-grit sandpaper. Sanding smooths rough patches and helps glue stick better. Wipe away dust after sanding to keep the surface clean. Avoid sanding too hard to protect the bag’s texture.
Repairing Peeling Areas
Repairing peeling areas on a faux leather handbag helps restore its look and extends its life. Start by cleaning the damaged section gently. Remove any dirt or oils that could stop the adhesive from sticking well. Trim away loose flakes carefully to create a smooth surface. This preparation sets the stage for a strong repair that lasts longer.
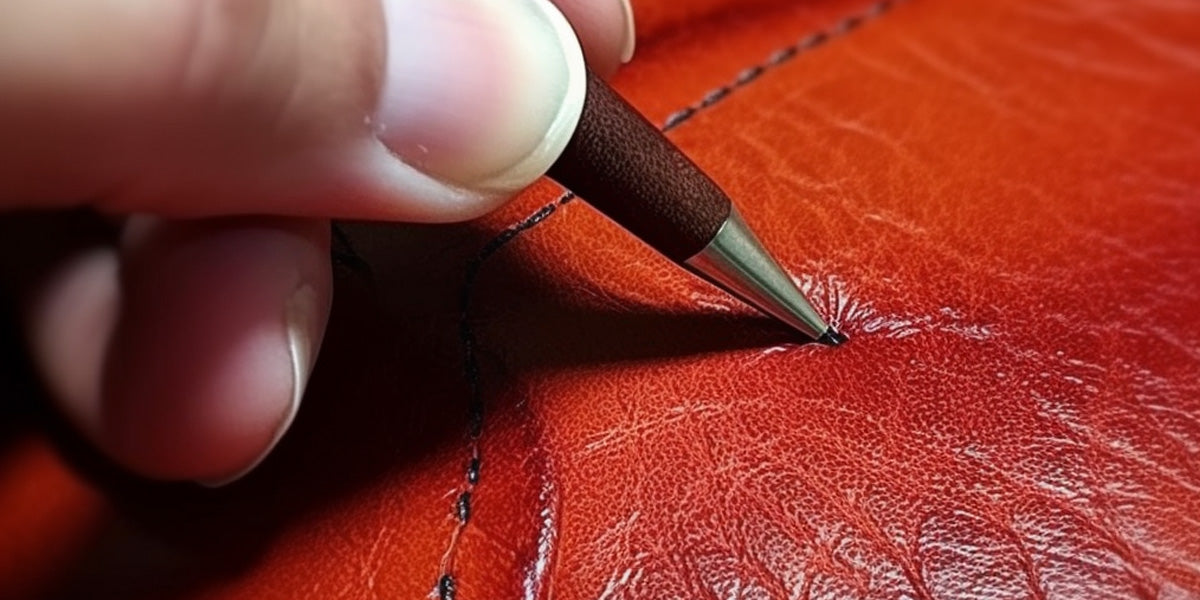
Applying Adhesive
Use a leather adhesive designed for faux leather or a mix of clear craft glue and acrylic paint. Apply a thin, even layer under the peeling edges with a toothpick or small brush. Work slowly to lift and glue down each flap. Avoid using too much glue to prevent lumps. Make sure the adhesive covers the entire peeling area for a secure bond.
Smoothing And Pressing
After applying adhesive, press the peeled layer firmly back into place. Use a flat tool or your fingers to smooth out any wrinkles or bubbles. Take care to align the edges neatly. Hold the pressed area steady for a minute or two to help the glue set. This step ensures the surface looks flat and natural after drying.
Drying Time Tips
Allow the adhesive to dry completely before using the handbag again. Drying time can vary from 30 minutes to a few hours, depending on the glue type. Place the bag in a cool, dry spot away from direct sunlight. Avoid moving or touching the repaired area during this time. Patience here helps the repair hold strong and last longer.
Restoring Color
Restoring the color of a peeling faux leather handbag brings it back to life. It hides damage and refreshes the bag’s look. The process involves careful dye or paint selection, smooth application, and skillful blending. Each step improves the bag’s appearance and extends its use.
Choosing The Right Dye Or Paint
Select a dye or paint made for faux leather. Look for water-based acrylic paints or leather dyes. These products stick well and stay flexible. Match the color closely to your handbag’s original shade. Test on a small hidden spot first. This prevents unwanted color changes or damage.
Applying Thin Coats
Apply the dye or paint in thin, even layers. Use a small brush or sponge to control coverage. Thin coats dry faster and avoid cracking. Let each layer dry completely before adding the next. Build up color gradually to get a smooth finish. Avoid heavy, thick layers that peel easily.
Blending For A Natural Look
Blend new color into the old for a seamless effect. Use gentle strokes around the edges of the painted area. Feather the paint to soften harsh lines. This helps the repair look natural and less noticeable. Finish with a clear sealant to protect and unify the surface.
Sealing The Repair
Sealing the repair is a vital step in fixing a peeling faux leather handbag. This process protects the patched area from further damage. It also helps the repair blend with the rest of the bag. Proper sealing keeps your handbag looking fresh and extends its life.
Using Fabric-specific Sealants
Choose sealants made for faux leather or fabric. These products create a strong, flexible layer over the repair. They prevent moisture and dirt from reaching the fixed spot. Apply the sealant with a soft brush or sponge. Let it dry fully between coats for best results. These sealants keep the surface smooth and natural-looking.
Alternatives Like Clear Nail Polish
Clear nail polish can work as a quick sealant. Use it on small, flat areas of the repair. Apply thin coats to avoid stiffness or cracking. Nail polish forms a hard, shiny finish that blocks peeling. It is a budget-friendly option but less flexible than fabric sealants. Use it carefully to maintain handbag flexibility.
Ensuring Durability
Seal the repair with multiple thin layers. This builds a tough protective shield. Allow each layer to dry completely before adding the next. Avoid overloading the sealant to prevent cracks or peeling. After sealing, keep the handbag away from heat and direct sunlight. Proper care helps the repair last longer and keeps your bag looking great.
Optional Conditioning
Conditioning your faux leather handbag is an optional step that can enhance its look and feel. It helps keep the material soft and less likely to crack again. Though not required for every repair, conditioning extends the life of your handbag after fixing the peeling.
Benefits Of Leather Conditioner
Leather conditioner adds moisture to faux leather. It prevents the material from drying out and becoming brittle. Conditioner also improves flexibility, reducing the chance of future peeling. It can restore some shine and make the bag look newer. Regular conditioning keeps your handbag soft and smooth to touch.
How To Apply Conditioner Safely
Start by cleaning the handbag with a soft cloth. Use a small amount of conditioner on a clean, dry cloth. Test the conditioner on a hidden area first. Gently rub the conditioner in circular motions over the surface. Avoid using too much product to prevent residue buildup. Let the conditioner absorb fully before using the bag. Repeat conditioning every few months for best care.
Quick Fixes And Alternatives
Fixing a peeling faux leather handbag can be simple with quick fixes and alternative methods. These solutions save time and extend your bag’s life. Choose the best option based on the damage size and your skills. Here are easy ways to repair your handbag without professional help.
Using Nail Polish And Markers
Nail polish can cover small peeling spots effectively. Pick a color that matches your handbag closely. Apply a thin coat over the peeling area. Let it dry completely before touching the bag. Use nail polish markers for better control on tiny spots. They work like paint pens and blend well with the surface.
This method works well for minor damage and quick touch-ups. Avoid thick layers to prevent cracking. Nail polish adds a shiny finish that looks neat and fresh.
Leather Repair Kits Overview
Leather repair kits include adhesives, fillers, and colorants. These kits are designed for faux leather repairs. Clean the damaged area before starting. Use the filler to smooth out cracks or holes. Apply colorant to match your handbag’s shade. Follow the instructions carefully for the best results.
Kits come with tools like spatulas and brushes for easy application. They create a durable fix and restore the bag’s look. Repair kits are perfect for medium-sized peeling or cracking.
Replacing Damaged Sections
For severe peeling, replacing the damaged section works best. Cut out the peeling part carefully with sharp scissors. Find a matching faux leather piece for replacement. Use strong fabric glue or a sewing kit to attach the new piece. Press firmly and let it dry or stitch securely.
This method requires more effort but offers a lasting fix. It can also add a stylish patch or design to your bag. Replacing sections keeps the handbag usable and attractive for longer.
Tips For Best Results
Fixing a peeling faux leather handbag needs care and patience. Following key tips improves your chances of success. These tips help avoid mistakes and protect your bag during repair.
Keep your workspace well-lit. Test products first on hidden spots. Know what repairs can and cannot fix. These steps make your work easier and results better.
Working In Proper Lighting
Good lighting reveals all peeling areas clearly. Use natural light or a bright lamp. Shadows hide small tears or cracks. Bright light helps you apply adhesives and paint evenly.
Proper lighting also reduces eye strain. You will work more carefully and avoid missing spots. Check your bag from different angles. This ensures a thorough repair job.
Testing Products On Hidden Areas
Always test adhesives or paints on a hidden area first. This prevents unwanted damage or color changes. Use a small amount and let it dry fully. Watch for peeling, discoloration, or texture changes.
If the product causes damage, try another brand or formula. Testing prevents surprises that can ruin your bag. It helps you choose the best materials for your repair.
Understanding Repair Limitations
Peeling faux leather can be tricky to fix perfectly. Deep cracks or large peeled sections may not fully restore. Repairs improve appearance but may not look brand new. Accepting this helps set realistic goals.
Repeated damage or poor-quality material may shorten your bag’s life. Use repairs to extend usability and enjoy your handbag longer. Handle your bag gently to prevent future peeling.
When To Consider Replacement
Knowing when to replace a peeling faux leather handbag saves time and money. Not all damage can be fixed easily. Sometimes, the wear is too severe. Other times, repairs cost more than buying new. Deciding to replace your bag needs careful thought. Look at the damage and the cost of repair. Also, consider finding professional help if unsure.
Assessing Severity Of Damage
Check how much peeling covers the bag. Small areas may be fixed with glue and paint. Large patches or deep cracks mean the bag is weak. If the lining or straps also break, it may not be worth saving. Damage that affects the bag’s shape often needs replacement. Use your judgment to see if repair will restore its look.
Cost Vs. Value Of Repair
Compare the price of repairs with the bag’s value. High repair costs can be more than a new bag. Consider how much you paid originally and how long you want to keep it. If repairs cost half or more, replacement is better. Also, think about how often you use the bag. Frequent use justifies repair more than rare use.
Finding Professional Help
Seek experts for tough repairs or luxury handbags. Professionals can fix peeling better and match colors well. They may offer a warranty on their work. Look for reviews or ask for recommendations. A skilled repair can extend your bag’s life by years. But if a pro says it’s beyond repair, trust their advice.


Frequently Asked Questions
How To Fix A Faux Leather Peeling Bag?
Clean the peeling area, trim loose flakes, then apply leather adhesive under lifted edges. Paint with matching leather dye. Seal with a top coat for durability. Condition the bag to prevent future peeling. Use a leather repair kit for best results.
How To Save Flaking Faux Leather?
Clean the area and trim loose flakes carefully. Apply leather adhesive under peeling parts and press firmly. Use matching leather paint for color touch-up. Seal with a leather top coat or fabric medium to protect. Condition the entire item to maintain flexibility and prevent future peeling.
What Does Vinegar Do To Faux Leather?
Vinegar cleans faux leather by removing dirt and grime without harsh chemicals. It also helps restore shine and softness. Avoid soaking; use diluted vinegar with a soft cloth for best results. Vinegar maintains faux leather’s appearance but never use it on peeling or damaged areas.
Can I Paint Over Peeling Faux Leather?
Painting over peeling faux leather is not recommended. First, remove loose flakes, apply leather adhesive, then repaint with matching leather paint. Seal the surface for durability. This method restores appearance and extends the item’s life effectively.
Conclusion
Fixing a peeling faux leather handbag takes patience and simple steps. Start by cleaning and trimming loose pieces carefully. Use adhesive to secure peeling layers, then apply matching paint for a fresh look. Sealing the area protects your work and extends the bag’s life.
Regular conditioning keeps the material soft and less prone to damage. Small repairs save money and keep your favorite bag looking good longer. Try these easy tips to bring your handbag back to life today.